 For a contractor, the first step in successfully marketing your business is showing the customer just how beautiful their home can look with landscape lighting installed! We’ve developed this helpful guide on how to tackle the task of taking quality project photos.
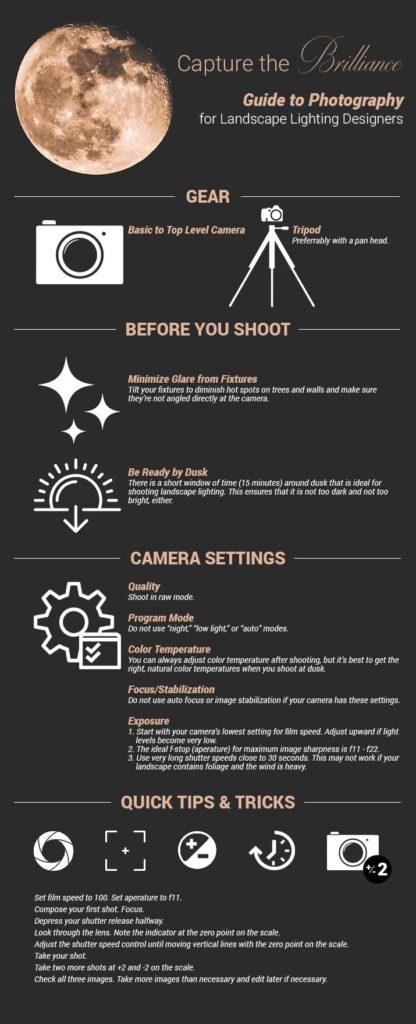
The Gear
Camera is key.
- Basic Level ($400 to $600) – Gives you manual control of the image quality for excellent photos. The Canon Rebel T6 Series (with basic lens) is in this range.
- Mid Level ($600 to $1,000) – Same manual controls as the basic level, but includes a better lens for sharper photos with less distortion. Again, the Canon Rebels are good choices – just select a lens upgrade.
- Landscape Lighting Wire. This is the wire (cable) that connects the transformer (and supplies power) to the lighting fixtures. The wire is rated according to the size of its conductors. Selecting the proper size wire is one of the most important aspects of the lighting plan.
- Top Level (greater than $1,000) – This budget gets you cameras with larger full-frame sensors for super-sized images, easy-to-use manual controls (especially important in the dark), and an excellent lens. Look to the Canon EOS 5D series.
Tripod
A good tripod is essential. It should be easy-to-use, sturdy, and good for both low and high shots. The tripod head is important – there are two main types – ball head and pan head. The ball head is best for video work since it lets you smoothly move your camera in any direction. For photography, I prefer the pan head – a platform secured by two knobs – vertical and horizontal. I like this because you can set your camera level, then make minor adjustments without losing your level.
Before you Shoot
- Permission – Put a photography clause in your contract that gives you permission to photograph the project and use it for promotional purposes. If you don’t have that, then create a short permission form that the client signs before the shoot.
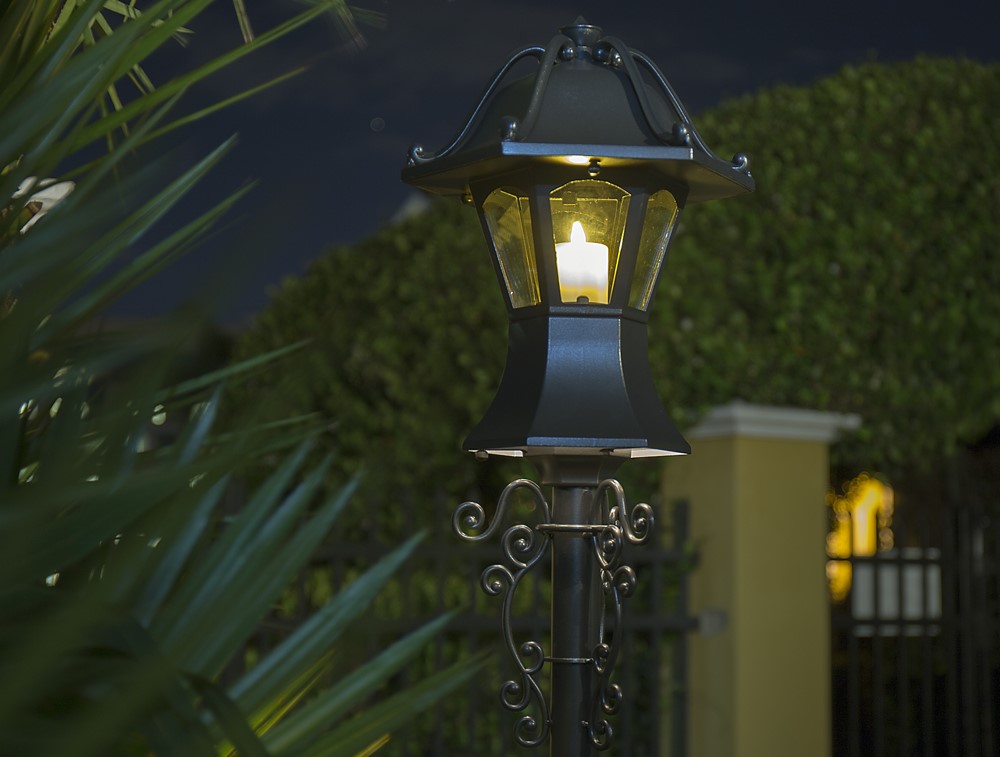
- Adjust your Lighting – While the aiming of your lights may be perfect for humans, the camera doesn’t like hot spots. I often tilt back spotlights to diminish hot spots on trees and walls.
- Time of Day – The optimal window for landscape lighting photography happens around dusk. The time frame is shorter than 30 minutes. The light present at dusk prevents photos from looking too dark and allows enough light to minimize post-editing.
Camera Settings
- Image Quality – Only shoot in raw mode. That gives you a huge amount of control in the image editing process. If your camera doesn’t do raw, use the highest quality setting available.
- Program Mode – You may be tempted to use “Night”, “Low Light”, or “Auto” modes; don’t use them, instead, always use the “Manual” mode.
- Color Temperature – This refers to the extent of yellowish or bluish tint to the white light present in the scene. If you are shooting before or during sunset, the color temperature of the ambient light may be as high as 8,000K. After sunset, your only concern is the color temperature of your lights – usually 2700K or 3000K. Higher-end cameras let you set the exact color temperature (indicated by the “K” symbol). Don’t worry too much about getting the perfect color temperature since you can adjust that when you edit the image in raw mode.
- Auto Focus. It doesn’t work at night. Turn it off.
- Image Stabilization. If your camera has this, don’t use it – again, it doesn’t work at night.
- Exposure – Three factors determine how much light reaches the image sensor
- Film Speed (ASA or ISO) – A throwback to film days, it relates to the sensitivity of the image sensor and the presence or lack of noise in the final image. The lower the film speed, the more light is needed and the least amount of noise. Most digital cameras have a minimum film speed of 100 – start with that setting. If ambient light levels become very low, then you may need to increase the film speed to 200 or 400 – higher numbers may result in a very noisy image.
- Aperture – Just as a human eye has an iris that narrows or widens in response to light, the camera also has an iris that can be adjusted to reduce or increase the amount of light hitting the sensor. The extent to which the iris is opened or closed is measured in f-stops. Smaller f-stops (such as f1.4 or f1.7) mean larger openings to let in more light. Larger f-stops (such as f16 or f22) are very small openings. The ideal f-stop for maximum image sharpness is in the range of f11 to f22. This range also gives you the greatest depth of field – meaning images close to the camera are nearly as sharp as images far away.
- Shutter Speed – The final component that determines exposure is the shutter. This device opens and closes for a set time. Most cameras have shutter speeds ranging from a fraction of a second to 30 seconds. Because landscape lighting levels are so low, very long shutter speeds are needed; the only downside is blurring of the image when plants are moving in the wind.
- Finding the Optimal Exposure – Now that we understand the effects of film speed, aperture, and shutter speed, how do you decide the best combinations in the field? Here’s what I do.
- Set film speed to 100. Set aperture to f11.
- Compose your first shot. Focus.
- Depress your shutter release halfway (to activate the light meter).
- Look through the lens and find the exposure scale located at the bottom of the image. Note the indicator at the zero point on the scale.
- While still looking through the lens, adjust the shutter speed control until the moving vertical line aligns with the zero point on the scale.
- Take your shot.
- Take two more shots at +2 and -2 on the scale.
- Check all three images and make sure the exposure on one is about right, and that the others are slightly too dark and too light. If needed, take more shots to ensure you’ve covered the range from too dark to too bright. It’s challenging to assess optimal exposure in the field, so take many shots and select the best to edit at your computer.
Tell a Story
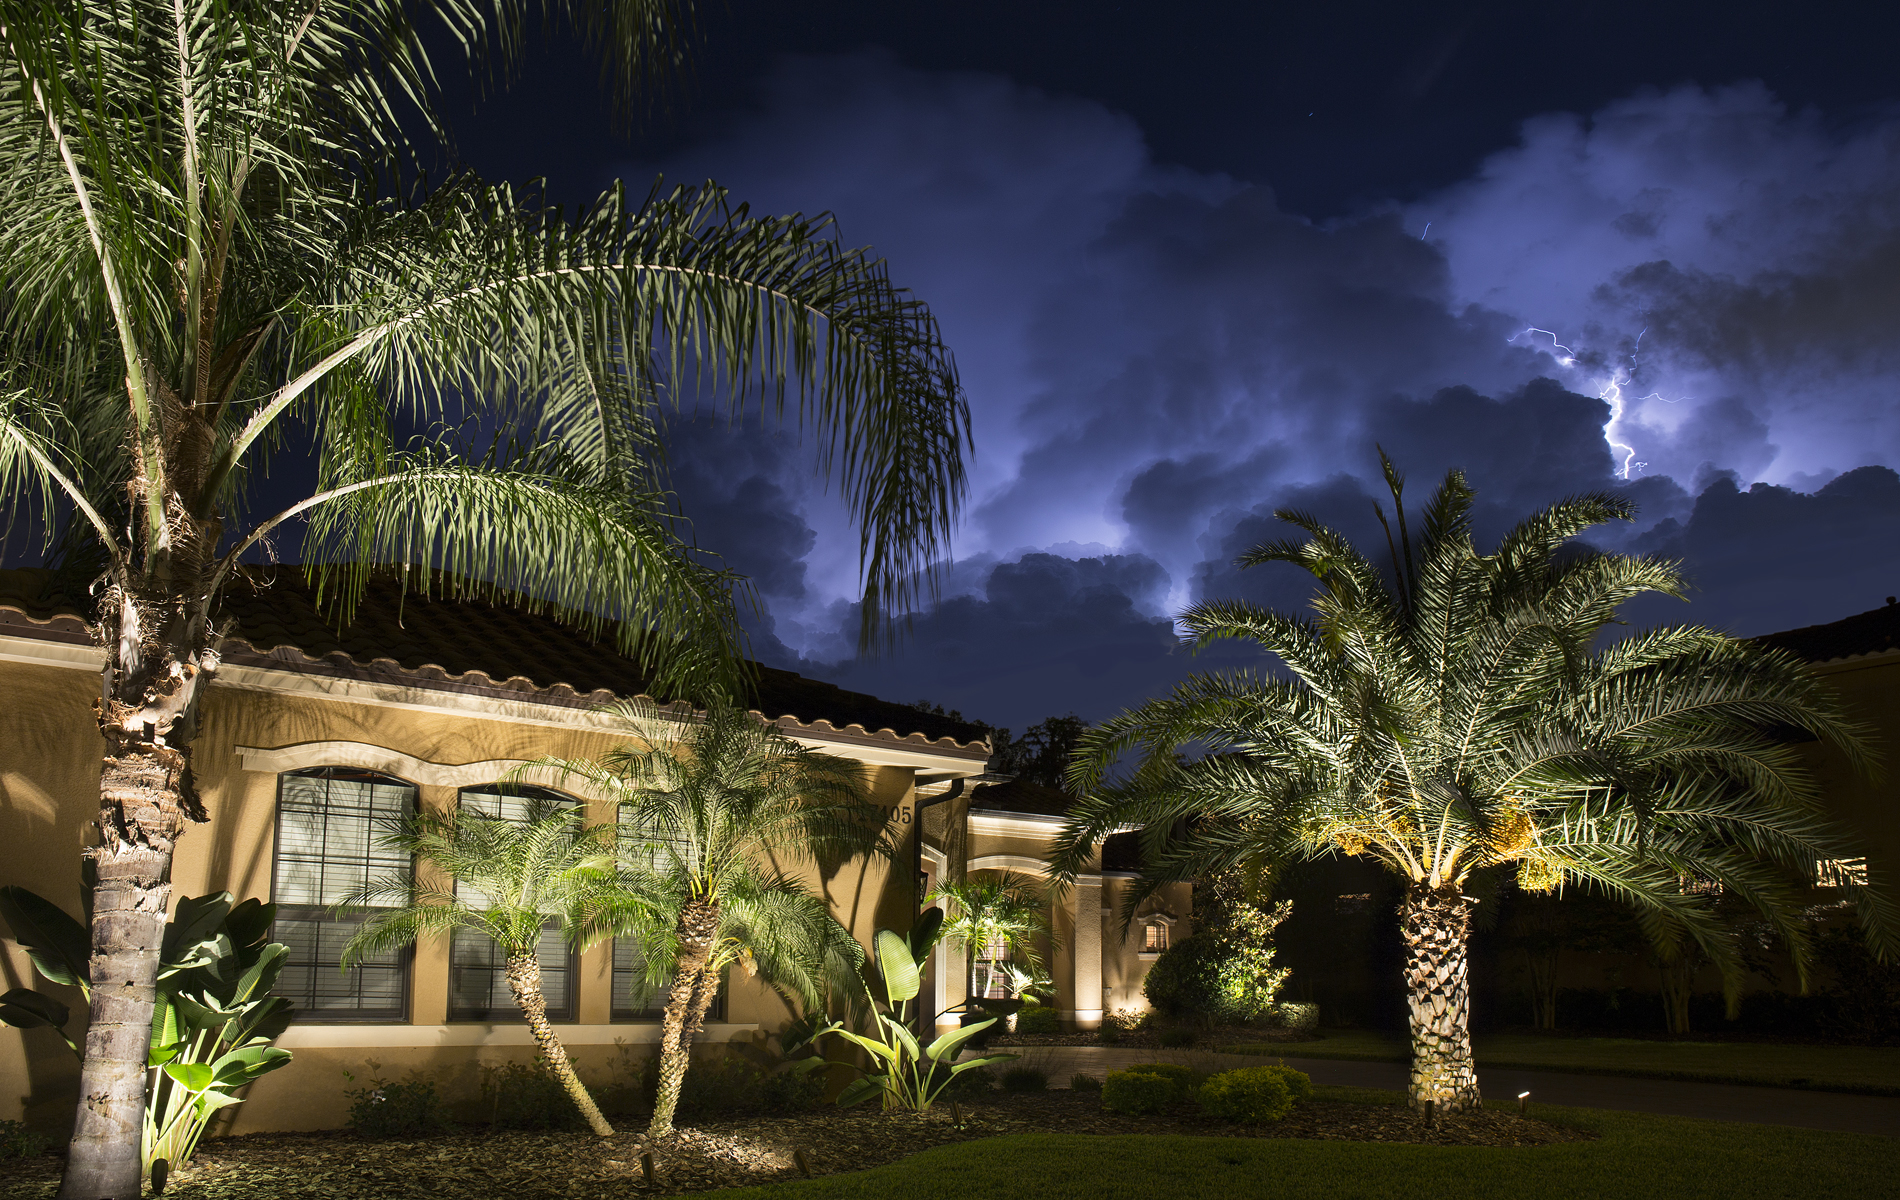
Before taking a photo, a good photographer always asks “What’s the story?” For example, a pathway lined with path lights tells the story of the homeowner walking the path – enjoying the safety, security, and beauty. If you took a picture of a portion of the path, does that tell this story? Or would it make more sense to show the beginning and end of the path – from the homeowner’s perspective. In the same way, think of capturing the experience of the homeowner in every region of the design.
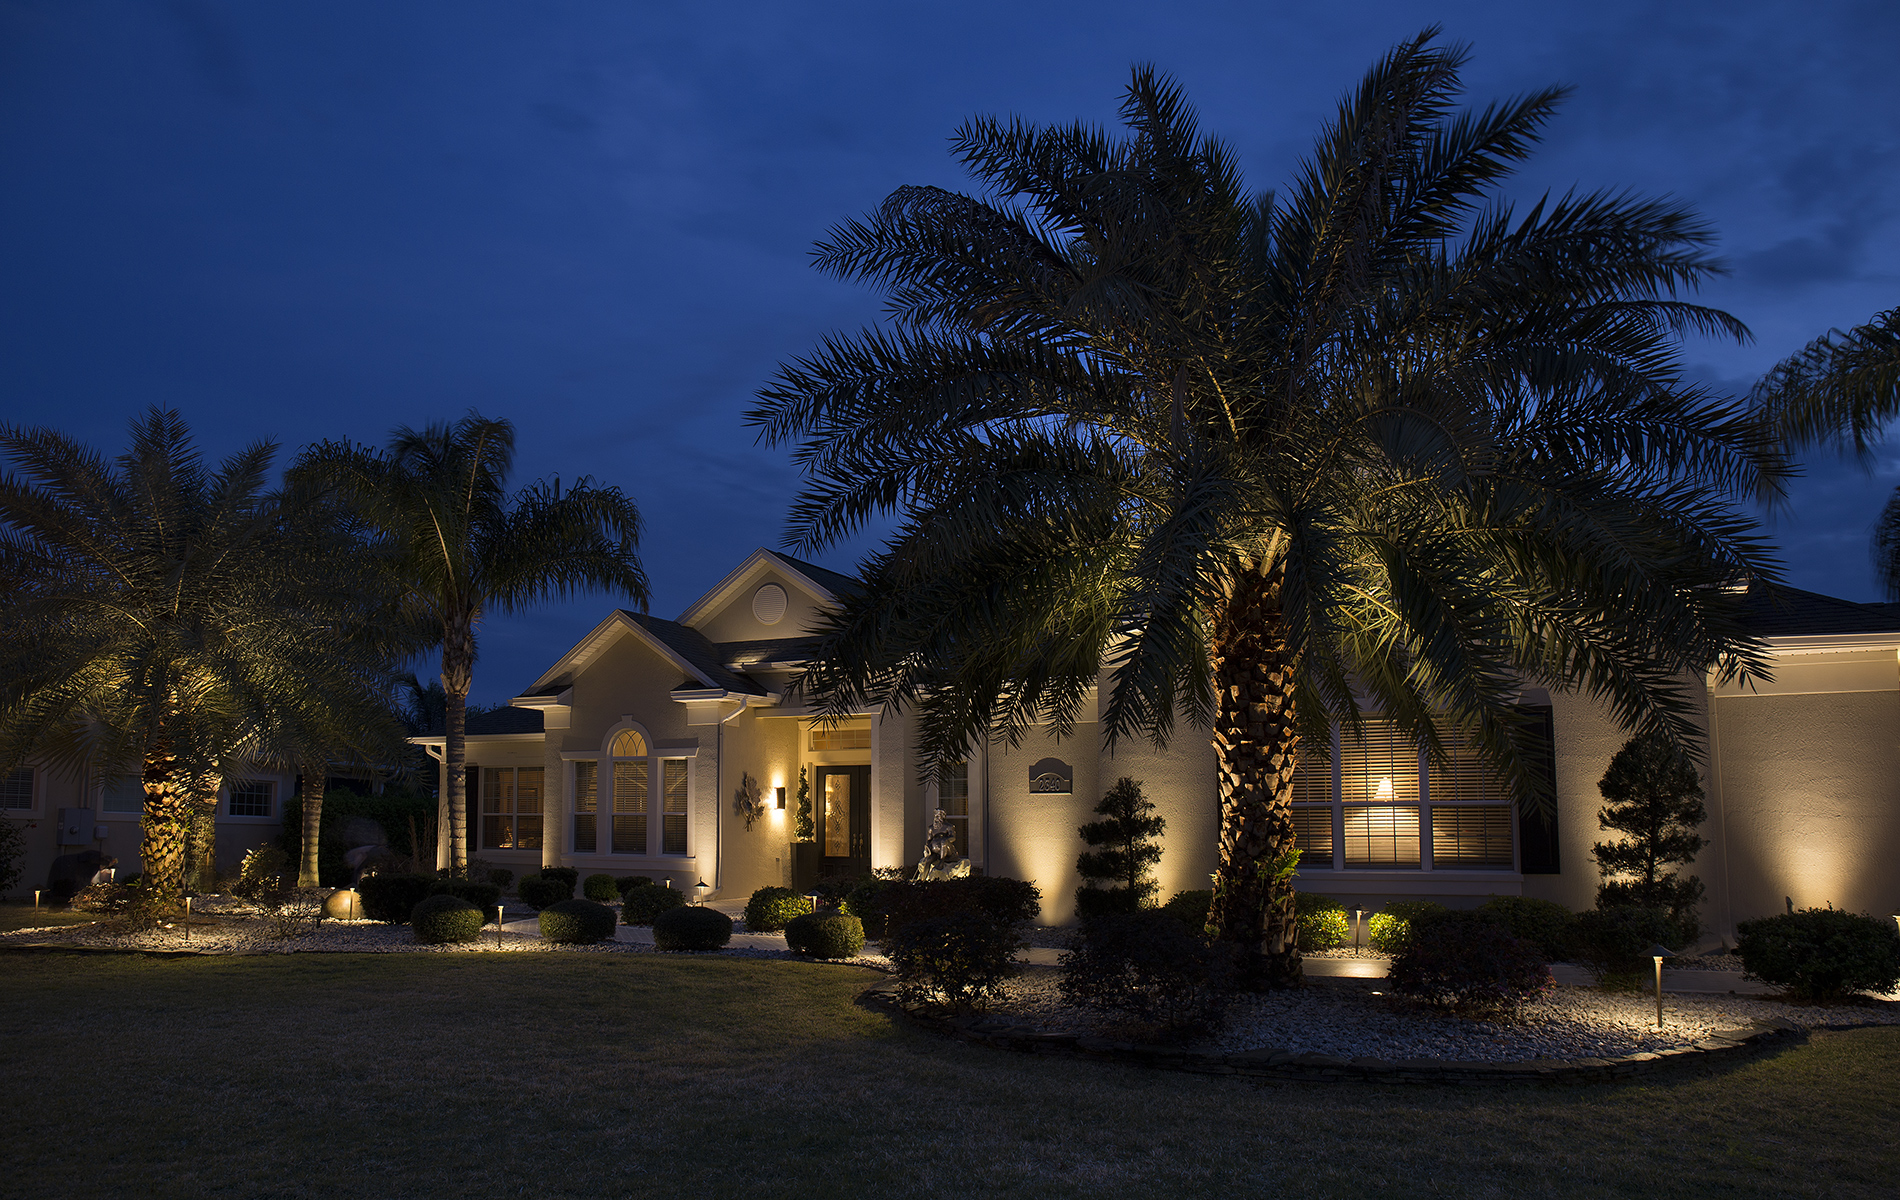
Capture the Big Picture
Always find places where you can shoot the entire house and property. When possible, frame the house under branches. Include objects close to the camera as well as far away – that creates depth.
Capture the Little Pictures
Take close-ups of illuminated plants and flowers. And, don’t ignore little landscape features such as urns, statues, and hardscape details.

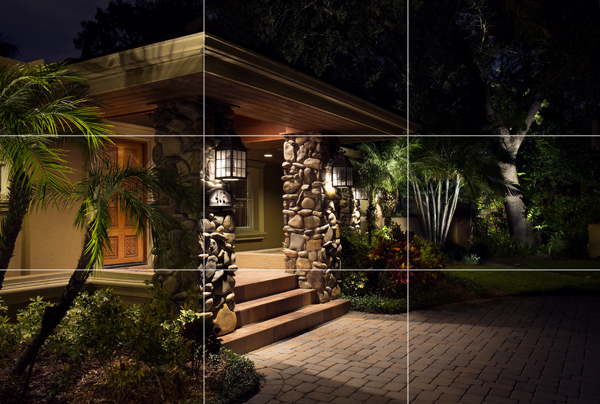
Position Objects in the Frame
When you have a scene with one or more principal objects in the foreground, position the camera so the objects look balanced and natural. The rule of thirds is beneficial. Imagine your image divided into three equal horizontal rows and three equal vertical columns. Position the frame so objects or boundaries align with one or more of these divisions.
Elevation
Look to mix up the elevation of your shots. I always bring a ladder to a shoot – and have a clamp that attaches my camera to the top. I also have a tripod that lets me shoot from less than a foot off the ground.