VOLT® Thin and Mini Thin Step Lights are extremely easy to install because they don’t require recessing. However, if you do need to recess step lights on deck stairs, here’s how you’d go about it.
Tools & Supplies
Tape measure, level, demo saw with wood bit, drill driver, pencil

Step 1: Measure the width of each riser and then mark the center where the fixture will be placed.

Step 2: Remove the screws and front faceplate from the fixture.

Step 3: Hold the fixture up into its approximate final location and measure down about a half-inch below the tread. This is where the fixture will sit.

Step 4: Use a level to make sure the fixture sits level underneath the step.

Step 5: Make a pencil mark across the top edge of the fixture.

Step 6: Measure the inside portion of the fixture that gets recessed into the step riser. This determines how big of a hole will need to be cut. In this case, it’s 6 and 3/4 inches by 2 and 5/8ths.

Step 7: From the center point and top line that was drawn earlier, transfer those measurements to the riser face itself. This will outline the cutout area. Be sure to use a level when marking lines.
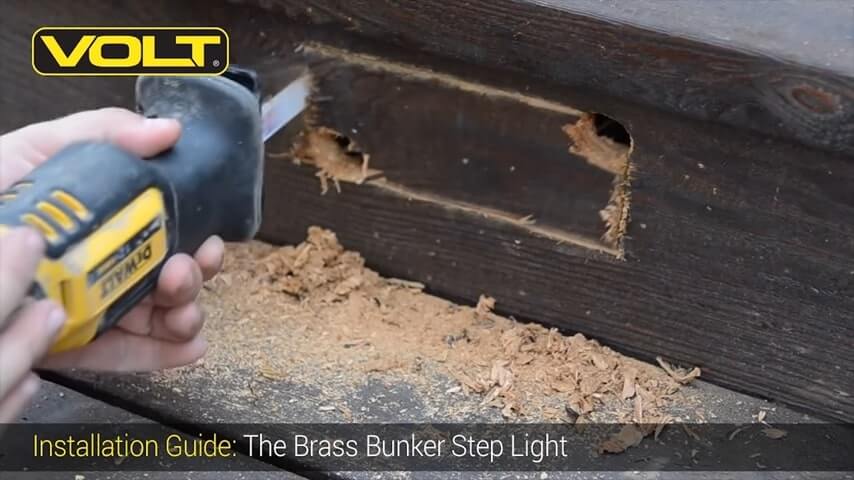
Step 8: Cut out the area for the fixture. Drill out a starter hole for the saw blade to fit into; pick two corners for this. Then run the saw blade along the lines that were drawn earlier. The fixture is now ready to install.

Step 9: Insert the bi-pin LED bulb into the socket, make the wiring connections under the deck and then set the fixture in place.

Step 10: Set a torpedo level along the bottom of the fixture. When it is sitting level, screw it in place to the riser. Now that the fixture is fully installed, put the faceplate back on.

This completes the installation of your step light. If you have questions about this or any other landscape lighting project, please call us at (813) 978-3700.