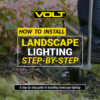
- Installing landscape lighting is an easy DIY project, but it’s best to create a plan first
- This involves sketching the property, setting the locations of the transformer and fixtures, and determining wire runs
- Common wiring options include a daisy chain, T-method, hub method or a combination
Laying out an installation plan for a low voltage landscape lighting system is fairly straightforward, but it’s helpful to know a few things up front. These are the main steps, along with some tips to ensure a successful installation.
Basic Layout
A landscape lighting system has four main components:
- Low Voltage Transformer. This is the power supply for the system. Ideally, it is mounted to a stand near the house, or attached directly to the structure – keep in mind the bottom of the transformer needs to be at least 12″ from the ground. Alternatively, the transformer could be located inside the house – usually the basement or garage. But running the wires through the wall requires the skills of an electrician since special codes apply. Outdoor installation is preferred for do-it-yourself installation.
- Fixtures. These are, of course, the producers of light. They get their power from the transformer. Each lighting fixture contains a light source – either an integrated (built-in) LED source or a replaceable lamp (bulb). The lamp could be the older incandescent (usually halogen) type or it could be an LED lamp. The voltage supplied to the fixtures is critical and we will discuss that below.
- Wire. This is the cable that connects to the transformer and supplies power to the fixtures. The wire is rated according to the size of its conductors. Selecting the proper size wire is one of the most important aspects of the lighting plan; we’ll elaborate below.
- Wire Connections. The wire from the transformer needs to connect to the wires from the fixtures. These connections can be made in several ways that involve any of various connector types. Again, these are described below.
Steps
1. Start a Sketch. Most landscape lighting designers begin their layout by creating a rough sketch of the property, marking where each fixture will be placed. For larger properties, use a separate piece of paper for each lighting region (zone). Try to be as accurate as possible with your sketch because you will be using it to help estimate distances for wire runs. You can use a blank piece of paper or graph paper. Attach this to a clipboard so you can walk the property and sketch as you go along.
2. Set the Transformer Location. The best placement for the low voltage transformer is usually next to the house in a hidden location (behind a garden bed, near air conditioning equipment, etc.). It should be as close as possible to the fixture locations. Sometimes it makes sense to use more than one transformer – especially when fixtures are situated throughout a large property. If multiple transformers are used then create a separate plan for each one. Mark transformer locations on your sketch.
3. Set Fixture Locations. Before you install any fixtures in the property, mark their approximate positions in the landscape using small flags or pencils. Indicate the positions on your sketch and mark what fixture types will go at each location. As you walk the property, make rough measurements to indicate the distances between fixtures and the transformer, and between the fixtures themselves.
4. Determine Wire Runs. Now, the task is to plan how to provide power to the fixtures. There are many wiring methods available. You don’t want to run a single wire from each fixture to the transformer – 20 fixtures, 20 wires all ending at the transformer – that would waste a lot of wire. Instead, we minimize the total amount of wire by using one of the following wiring methods.

How to select the best wiring method for landscape lighting
-
- Daisy chain. This method connects all fixtures like a string of daisies (hence “daisy chain”). The first fixture connects to the transformer. The challenge with this method is that the voltage on this low-voltage current decreases with distance. That means the first fixture may have 12 volts while the last fixture may have 9 volts. That’s OK for VOLT® LED lights because they have an acceptable voltage range of 8V to 15V. However, that would be a potential issue for halogen lights because they have a very narrow range (10V to 12V). Use the daisy chain method when fixtures are not grouped and can be easily connected in a chain. Note that you can consider a hub just like a single fixture; put it into your daisy chain.
- T-method. This method is identical to the daisy chain except the transformer connects to a fixture in the middle of the chain. The overall voltage loss is the same but this method is used primarily to save on the amount of wire used in the project. Use the T-method when you have built a daisy chain in the field and want to connect it to the transformer from the middle of the chain, at whatever point saves you the most wire.
- Hub method. This method sends each wire run to a hub junction. From the junction, a single wire runs to each fixture. This was the preferred method for incandescent lights because it ensures equal voltage at all fixtures. Since LEDs have a wide range of acceptable voltage (8V t 15V), the hub method is not preferred because it uses more wire than other methods. It does, however, dramatically reduce the number of splices in the field – a big time-saving advantage. Use the hub method when fixtures are grouped in a small area such as in a garden bed.
- Combination method. The preferred method for most LED systems because it combines the other methods to conserve wire, reduce splices, and make installations easier and faster. While this may seem to complicate things, it’s actually a simple approach. Use the combination method when you want to use any of the above methods together. You have a lot of flexibility with LED lighting systems – wide acceptable voltage range and low wattage – these make for minimal voltage loss and less concern about what method you use.
Tips for optimal installation and results
- Define your goals. You may have a very specific goal (such as “light my front walkway”), and that’s fine for a limited project. But landscape lighting can improve many things on your property, including:
- Safety. Ensure that no one trips or falls on your property.
- Security. Illumination deters would-be intruders.
- Beauty. Use light to reveal beauty already existing in the landscape, or use light and shadow to create new beauty.
- Lifestyle. Extend your backyard living space and illuminate recreational areas
- Economy. If you have non-LED lighting on your property, start saving money with energy-efficient LEDs.
- Lower loads per run means lower voltage drop. This is not much of a concern for LED systems since voltage drop for most systems is minimal. But if your system is large (more than 15 fixtures or about 100W), break up your layout into multiple cable runs of about 100-150 watts per run. If you have more than 150 watts in an area, divide it into two runs. For LEDs, lower wattages mean you can group more fixtures onto a single run, but keep in mind that it still makes sense to use one home run wire for each zone; this is more energy-efficient and makes for easier troubleshooting.
- Break your layout into distance zones. For example, put fixtures 15-30 feet away from the transformer on one run; fixtures 25-40 feet on another run; fixtures 30-50 feet on another run; and so on. The goal is to have all the fixtures on a run be roughly the same distance from the transformer so they have similar amounts of voltage drop. That way when you adjust for voltage drop by increasing the voltage for that one run, the lights are not over-volted or under-volted.
- Calculate the cable gauge and length needed to reach the transformer. The lower the gauge, the thicker the wire. Systems that don’t have super-long wire runs (over 150 feet) can typically use 16 or 14 gauge wire. For longer runs, use lower gauge wire to prevent voltage drop. You will need about 100 feet of 12 gauge cable for every 100 watts. More specifically, multiply the amount of wattage per zone by the cable length in feet. For example, if you have 120 watts, and 75 feet, that equals 9,000. If the total is less than 10,000, use a 12 gauge cable. If the total is between 10,001 – 15,000, use a 10 gauge cable or split the zone into two smaller zones.
- Select the proper transformer. Calculate the total wattage of your system by adding up all of the bulb or integrated fixture wattages. This is your consumed wattage. Then select a low voltage transformer with a wattage greater than your consumed wattage; now multiply your chosen transformer’s wattage by 80 percent. This is because you must keep at least a 20 percent buffer as maximum capacity, as recommended by most manufacturers. If you are still within the transformer’s capacity, you can use that transformer. If not, step up to the next size.