Today, we’re going to demonstrate how to install a hardscape light in a segmental block column, which are very common in landscapes today. We’ll use the VOLT® Undercover Hardscape Light – a solid cast brass, low-profile fixture that fits under overhangs in a variety of applications.
Tools: 4 to 4.5 inch angle grinder with a diamond tipped wheel, caulking gun, masonry chisels, masonry hammer, small cordless hammer drill with a 3/16 inch masonry bit
Supplies: Eye protection, ear protection, half inch piece of ground rod, landscape adhesive, tape measure, pencil, Sharpie
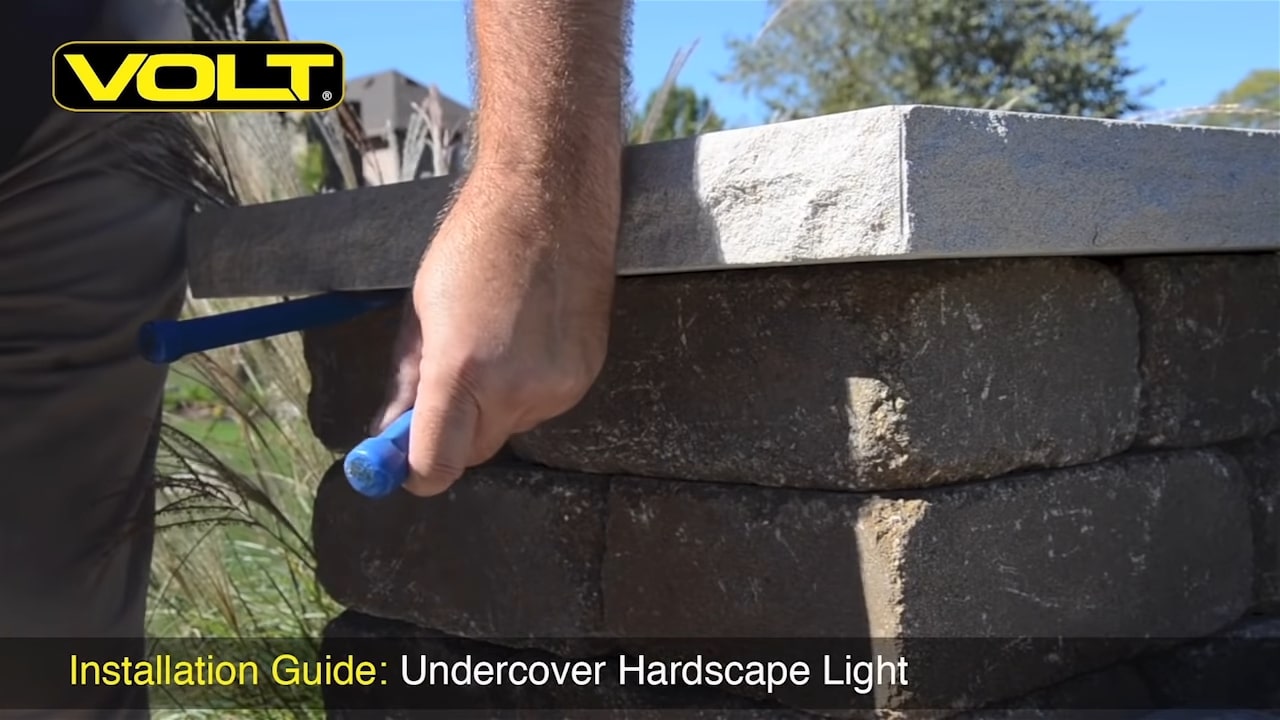
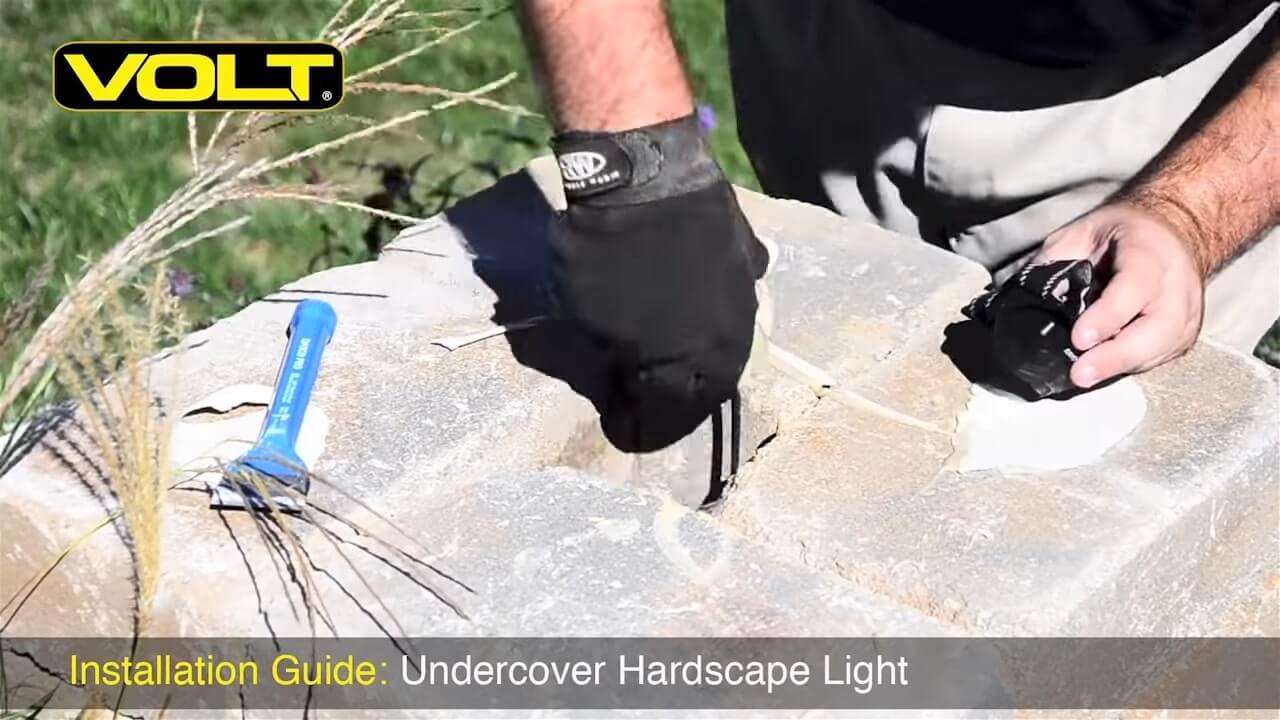
Step 1: Remove the capstone. Use two chisels together to break the glue that’s holding down the stone. Once you’ve broken the top stone away from the glue, you can pry that stone up and lift it free from the top of the column. With the capstone removed, we can now see the center cavity where our wire will run.
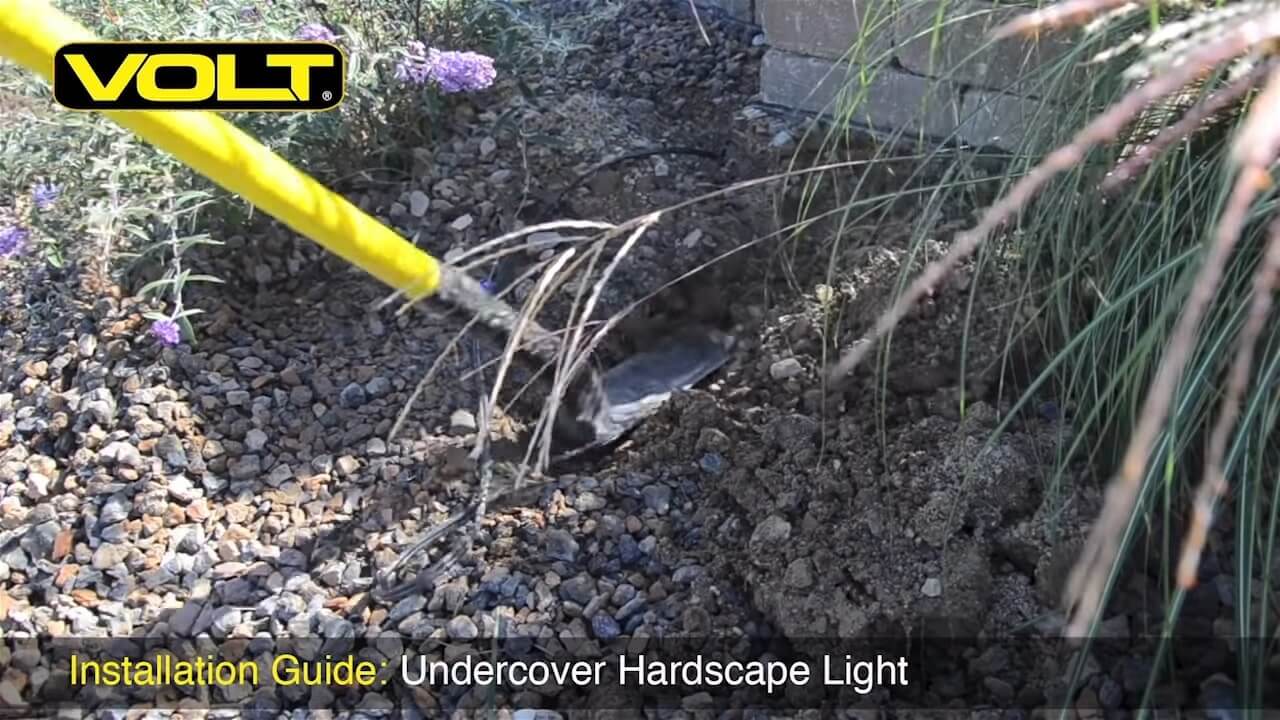
Step 2: Dig. To get our wire inside the column, first clear away the stone or mulch from the digging area. Begin digging straight down in front of the column; clear the gravel and dirt away until you fully expose the bottom block in the column. Then dig back away from the column – just be sure you don’t under-dig the column; you want to leave that gravel in place.
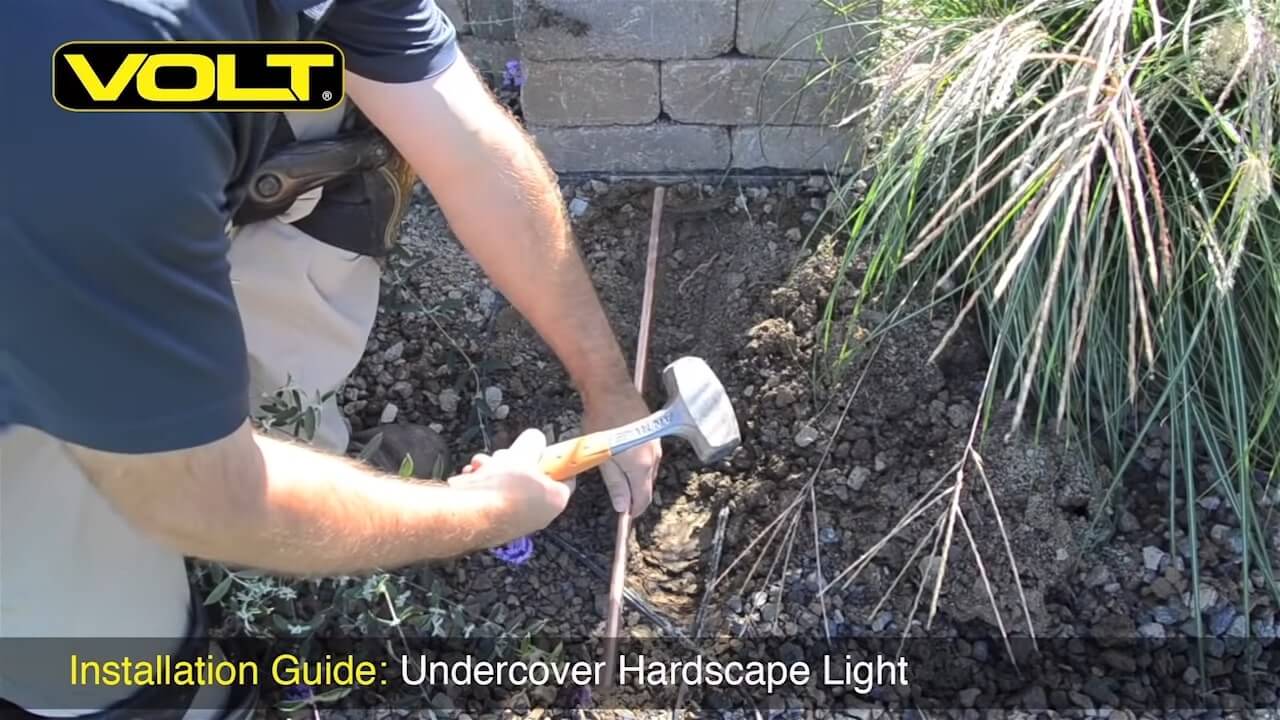
Step 3: Insert rod. Take a short rod and begin tapping it inside toward the open cavity. Angle it slightly upward; the pipe should be sliding right against the bottom stone as it goes through. Give it an occasional twist; this will help you remove it from the hole.
Step 4: Remove rod and insert wire. Give the rod a little twist and slide it straight back, being careful not to disturb the gravel. Now slip the end of your wire inside the cavity; 5 or 6 feet should do it. Now reach down inside the hole, grab the end of your wire and pull it up to the top. Watch out for spiders; they love to live in these holes.
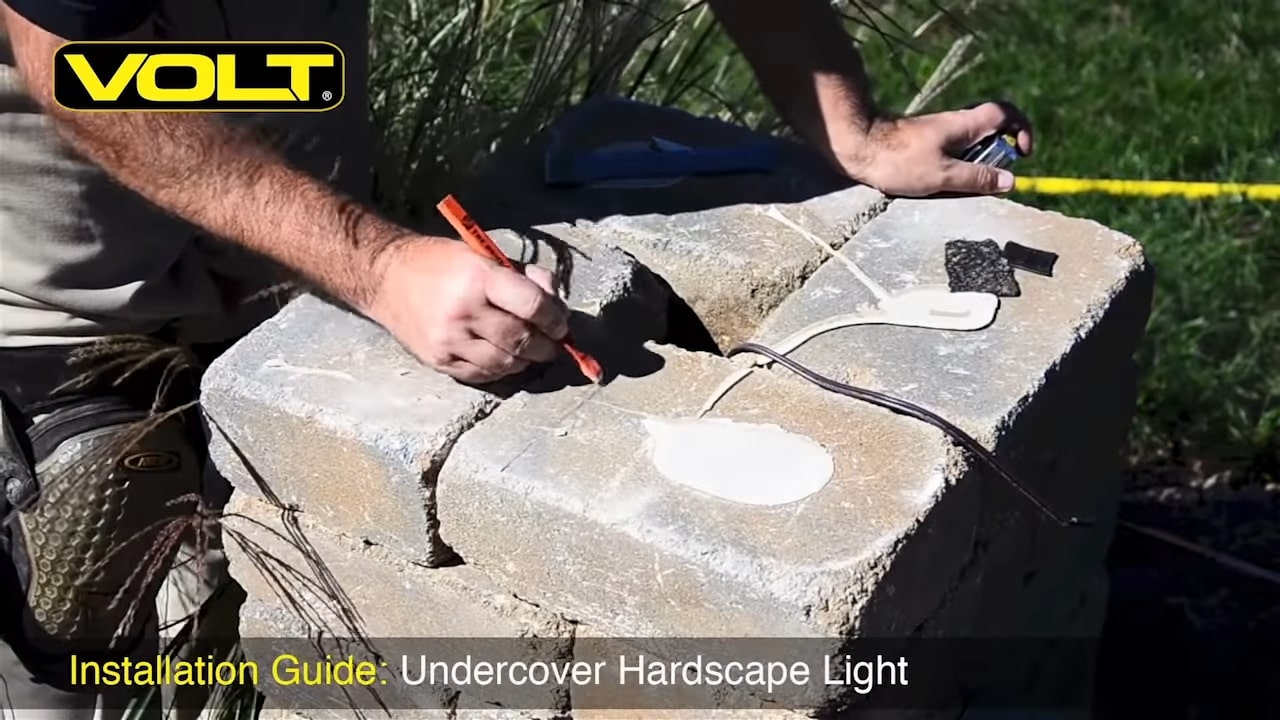
Step 5: Mark the fixture placement. With a pencil and tape measure, mark the location of where the fixture will be placed. Mark the center point of the face of the fixture – in this case, it’s going to be 10 inches. Mark a line straight from the back of the block all the way to the face.
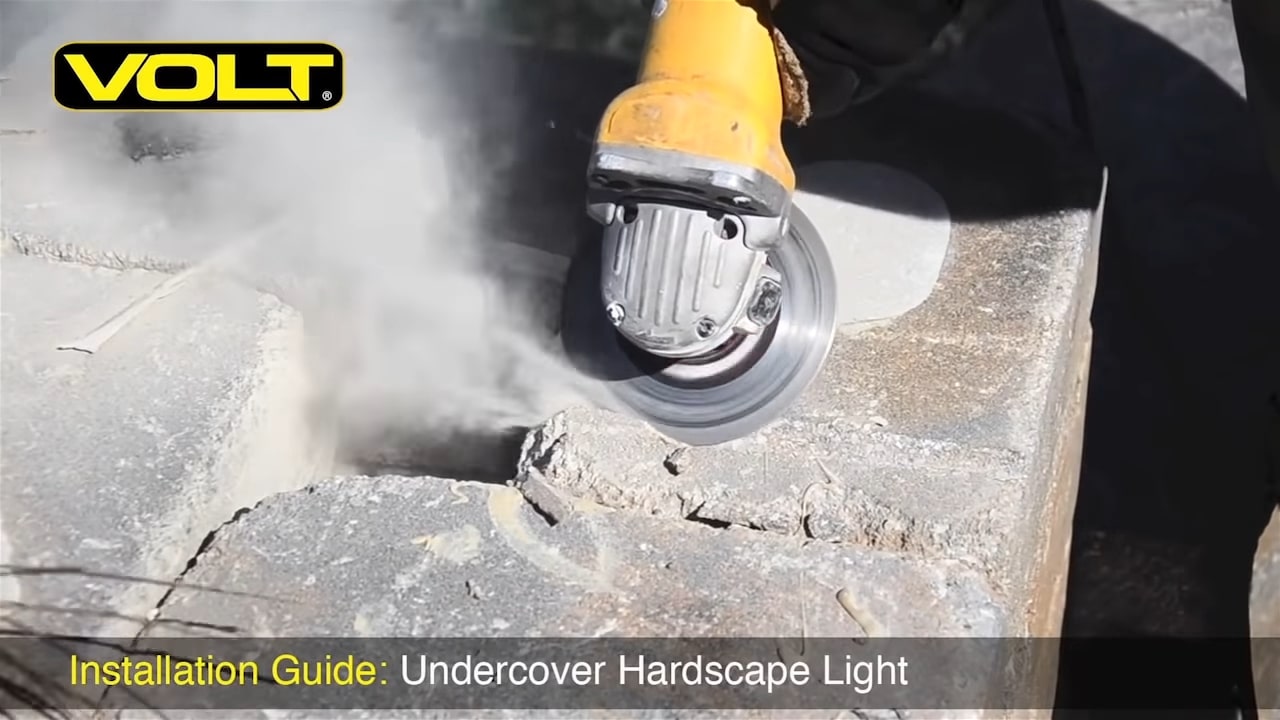
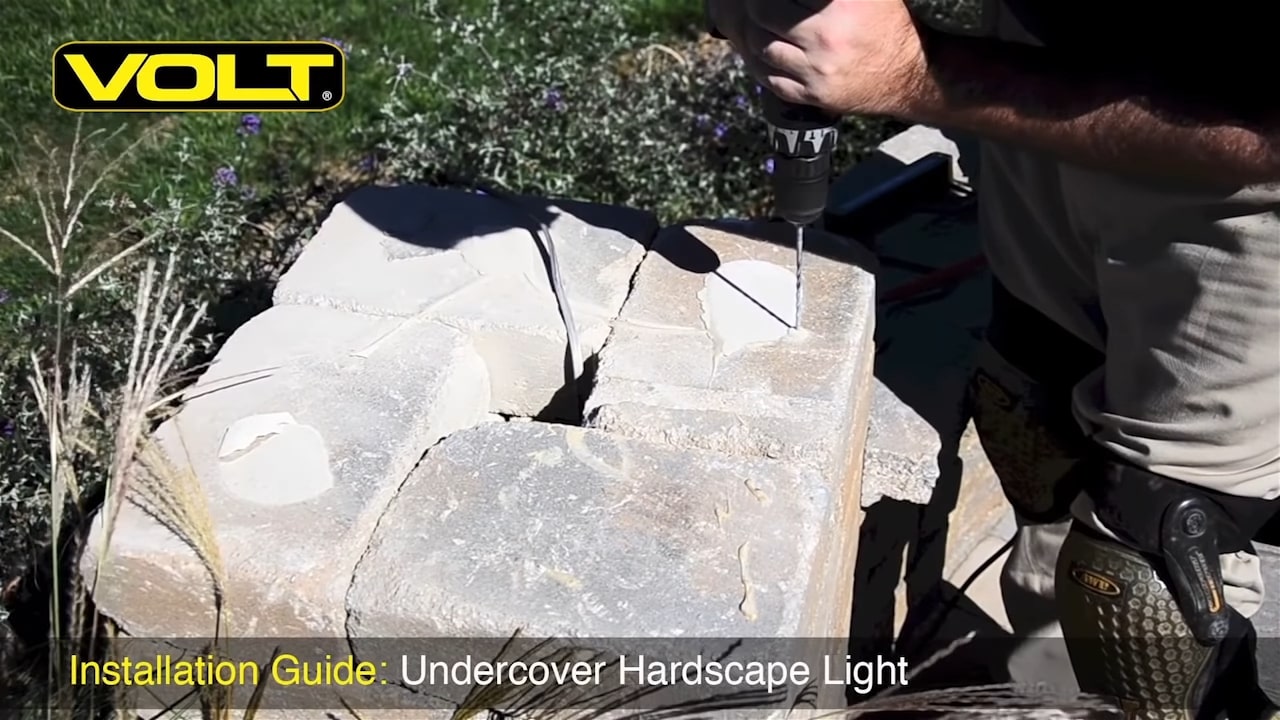
Step 6: Score a trough. With your angle grinder and the diamond wheel, begin scoring a trough on the line that you just marked. This line will need to be about half an inch wide by half an inch deep to ensure that the wire lays flat all the way inside the trough so the top cap will lay flush.

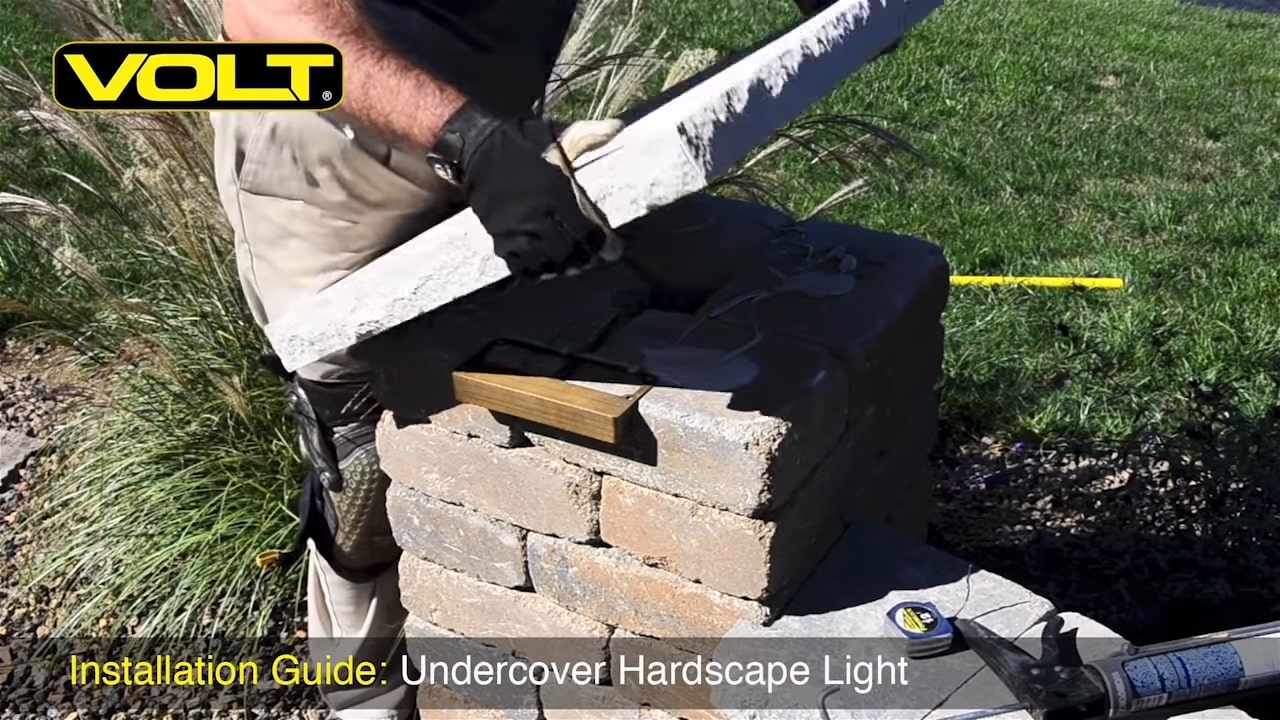
Step 7: Set the fixture in place. Be sure to slide the brass tube all the way up to the back of the light fixture; this will protect the wire. With a tape measure, make sure that there’s equal distance from side to side; you want to make sure that light sits nice and even on the front of the post.
Step 8: Drill masonry anchors. In the back bracket of the light, use your pencil to mark holes for masonry anchors. Now with a hammer drill, drill each of these holes about 1 inch deep. In the hardware provided, you’ll find two masonry sleeves. Slide these in the hole and tap them in so they sit nice and flush with the stone.
Step 9: Secure the fixture. Apply some masonry adhesive on top of the column. After you’ve made the internal connection for the fixture, set the capstone back in place. Now finish by making your home run connections outside the column.
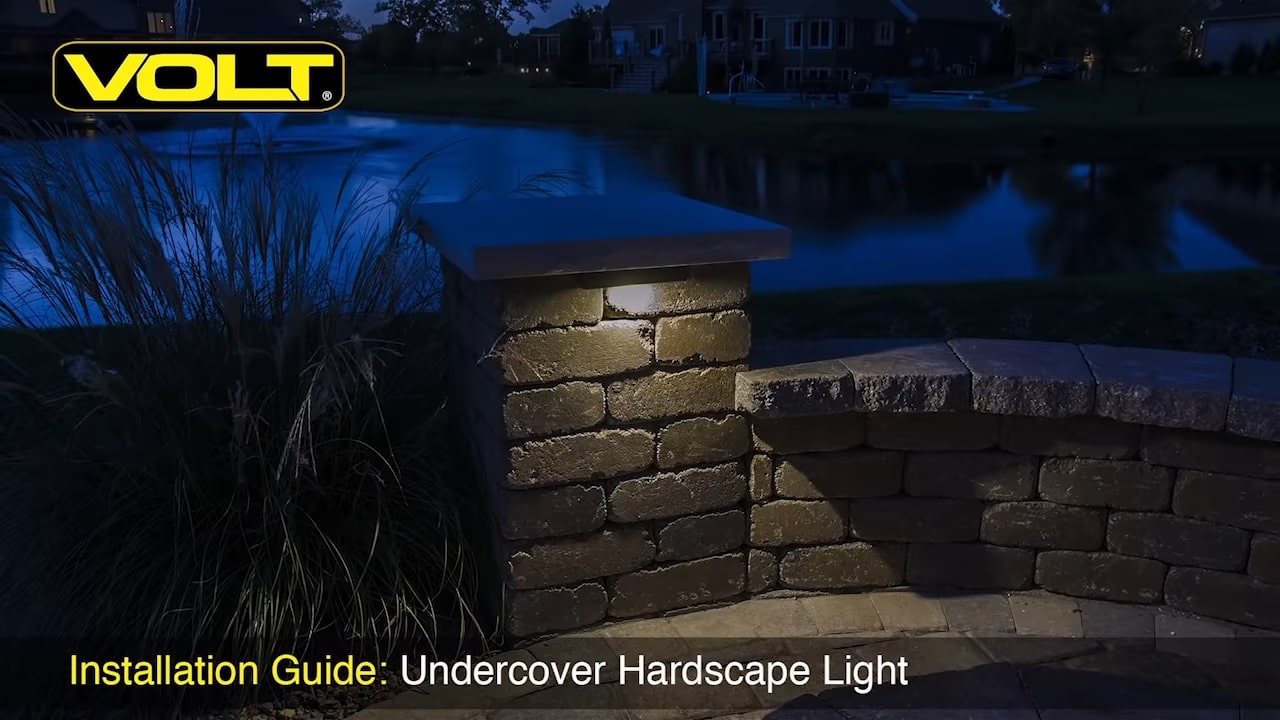
This completes the installation of the hardscape light in the column. As always, if you have any questions about this project or anything else pertaining to landscape lighting, please give us a call at (813) 978-3700.