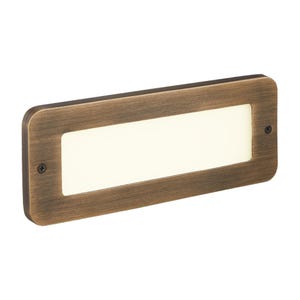
 Large Thin Step Light (Open)$79.97
Style: Integrated LED
Light Output: 20 lumens
CCT: 2700K (warm white)
Material: Cast Brass (thick/heavy)
Finish: Bronze
LIFETIME WARRANTY
Learn More Large Thin Step Light (Louvered)$79.97
Style: Integrated LED
Light Output: 20 lumens
CCT: 2700K (warm white)
Material: Cast Brass (thick/heavy)
Finish: Bronze
LIFETIME WARRANTY
Learn More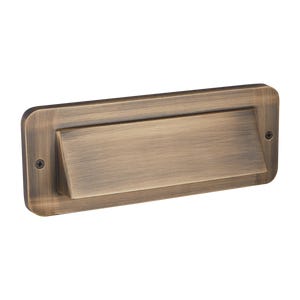 Large Thin Step Light (Hooded)$79.97
Style: Integrated LED
Light Output: 20 lumens
CCT: 2700K (warm white)
Material: Cast Brass (thick/heavy)
Finish: Bronze
LIFETIME WARRANTY
Learn More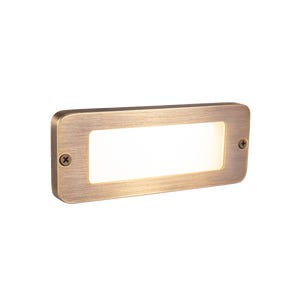 Small Thin Step Light (Open)$69.97
Style: Integrated LED
Light Output: 10 lumens
CCT: 2700K (warm white)
Material: Cast Brass (thick/heavy)
Finish: Bronze
LIFETIME WARRANTY
Learn More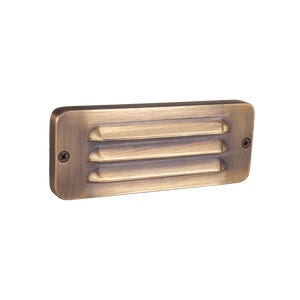 Small Thin Step Light (Louvered)$69.97
Style: Integrated LED
Light Output: 10 lumens
CCT: 2700K (warm white)
Material: Cast Brass (thick/heavy)
Finish: Bronze
LIFETIME WARRANTY
Learn More Small Thin Step Light (Hooded)$69.97
Style: Integrated LED
Light Output: 10 lumens
CCT: 2700K (warm white)
Material: Cast Brass (thick/heavy)
Finish: Bronze
LIFETIME WARRANTY
Learn More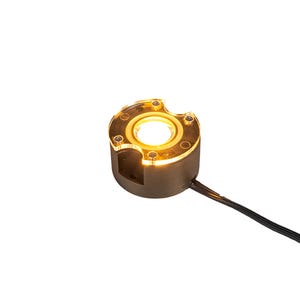 2700K G2 BuddyPro (Open)
As low as $49.97
Style: Integrated LED
Light Output: 100-330 lumens
CCT: 2200, 2700K
Material/Finish: Cast Brass / Bronze
IP Rating: IP67 (waterproof)
LIFETIME WARRANTY
Learn More
 2700K G2 BuddyPro (Shielded)
As low as $59.97
Style: Integrated LED
Light Output: 100-330 lumens
CCT: 2200, 2700K
Material/Finish: Cast Brass / Bronze
IP Rating: IP67 (waterproof)
LIFETIME WARRANTY
Learn More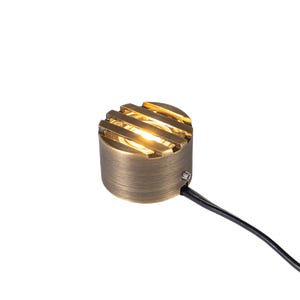
 2700K G2 BuddyPro (Grated)
As low as $59.97
Style: Integrated LED
Light Output: 100-330 lumens
CCT: 2200, 2700K
Material/Finish: Cast Brass / Bronze
IP Rating: IP67 (waterproof)
LIFETIME WARRANTY
Learn More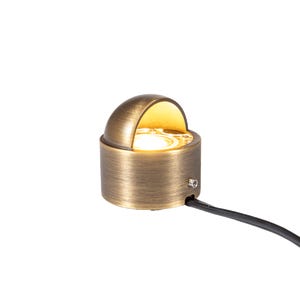
 2700K G2 BuddyPro (Beacon)
As low as $59.97
Style: Integrated LED
Light Output: 100-330 lumens
CCT: 2200, 2700K
Material/Finish: Cast Brass / Bronze
IP Rating: IP67 (waterproof)
LIFETIME WARRANTY
Learn More
 2700K G2 BuddyPro (Turret)
As low as $59.97
Style: Integrated LED
Light Output: 100-330 lumens
CCT: 2200, 2700K
Material/Finish: Cast Brass / Bronze
IP Rating: IP67 (waterproof)
LIFETIME WARRANTY
Learn More- New
 RGBCW G2 BuddyPro (Open)
As low as $59.97
Style: Integrated RGBCW LED
Light Output: 35-209 lumens (dimmable)
CCT: 2200K, 2700K, 3000K, 4000K
Material/Finish: Cast Brass / Bronze
IP Rating: IP67 (waterproof)
LIFETIME WARRANTY
Learn More - New

 RGBCW G2 BuddyPro (Shielded)
As low as $69.97
Style: Integrated RGBCW LED
Light Output: 35-209 lumens (dimmable)
CCT: 2200K, 2700K, 3000K, 4000K
Material/Finish: Cast Brass / Bronze
IP Rating: IP67 (waterproof)
LIFETIME WARRANTY
Learn More - New

 RGBCW G2 BuddyPro (Grated)
As low as $69.97
Style: Integrated RGBCW LED
Light Output: 35-209 lumens (dimmable)
CCT: 2200K, 2700K, 3000K, 4000K
Material/Finish: Cast Brass / Bronze
IP Rating: IP67 (waterproof)
LIFETIME WARRANTY
Learn More - New

 RGBCW G2 BuddyPro (Beacon)
As low as $69.97
Style: Integrated RGBCW LED
Light Output: 35-209 lumens (dimmable)
CCT: 2200K, 2700K, 3000K, 4000K
Material/Finish: Cast Brass / Bronze
IP Rating: IP67 (waterproof)
LIFETIME WARRANTY
Learn More - New

 RGBCW G2 BuddyPro (Turret)
As low as $69.97
Style: Integrated RGBCW LED
Light Output: 35-209 lumens (dimmable)
CCT: 2200K, 2700K, 3000K, 4000K
Material/Finish: Cast Brass / Bronze
IP Rating: IP67 (waterproof)
LIFETIME WARRANTY
Learn More - New

 2700K Micro Dot Indicator Light (Bronze)$29.97
Style: Integrated LED
Light Output: 27 lumens
CCT: 2700K (warm white)
Material/Finish: Cast Brass / Bronze
IP Rating: IP67 (waterproof)
LIFETIME WARRANTY
Learn More 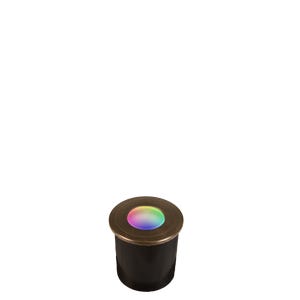 RGBW Micro Dot Indicator Light (Bronze)$34.97
Style: Integrated RGBW LED
Light Output: 27 lumens
CCT: 2700K (warm white)
Material/Finish: Cast Brass / Bronze
IP Rating: IP67 (waterproof)
LIFETIME WARRANTY
Learn More- New

 2700K Micro Dot Indicator Light (Black)$34.97
Style: Integrated LED
Light Output: 27 lumens
CCT: 2700K (warm white)
Material/Finish: Cast Brass / Black
IP Rating: IP67 (waterproof)
LIFETIME WARRANTY
Learn More - New

 RGBW Micro Dot Indicator Light (Black)$39.97
Style: Integrated RGBW LED
Light Output: 27 lumens
CCT: 2700K (warm white)
Material/Finish: Cast Brass / Black
IP Rating: IP67 (waterproof)
LIFETIME WARRANTY
Learn More 
 RGBW Rope Light (16ft)$149.97
Style: Integrated RGBW LED
Light Output: 329 lumens
CCT: 2700K (warm white)
Material/Finish: Silicone / White
IP Rating: IP67 (waterproof)
LIFETIME WARRANTY
Learn More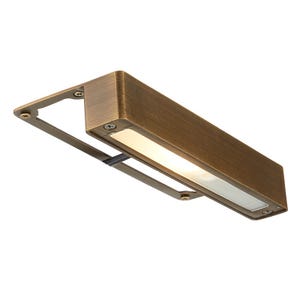
 Undercover Hardscape Light
As low as $49.97
Style: Lamp-Ready
Bulb Size: G4 Bi-Pin (customizable)
Light Output: 150-425 lumens
Material: Cast Brass (thick/heavy)
Finish: Bronze
LIFETIME WARRANTY
Learn More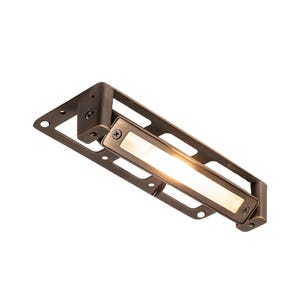
 Rotatable Undercover Hardscape Light
As low as $59.97
Style: Lamp-Ready
Bulb Size: G4 Bi-Pin (customizable)
Light Output: 150-425 lumens
Material: Cast Brass (thick/heavy)
Finish: Bronze
LIFETIME WARRANTY
Learn More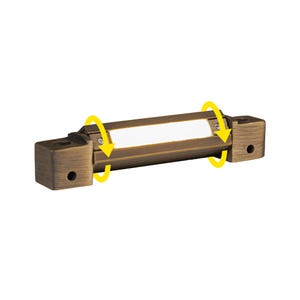
 3" Rotating/Pivoting Hardscape Light
As low as $44.97
Style: Integrated LED
Light Output: 15 lumens
CCT: 2700K (warm white)
Material: Cast Brass (thick/heavy)
Finish: Bronze
LIFETIME WARRANTY
Learn More
Step Lights: LED Stair Lights
We’re Here to Help
Need assistance? Get in touch with VOLT® by phone, via email or through our website.
Certified Lighting Experts
Service Line: 813-978-3700
Mon - Fri 8 AM - 8 PM EST
Sat - Sun 10 AM - 6 PM EST
Local Pickup Available
VOLT University
Outdoor lighting installation tips, design ideas, project advice and more from our experts.
Join the Conversation
Ask questions or share your project photos and stories